Making a multifunctional media server from an old amplifier using Raspberry pi
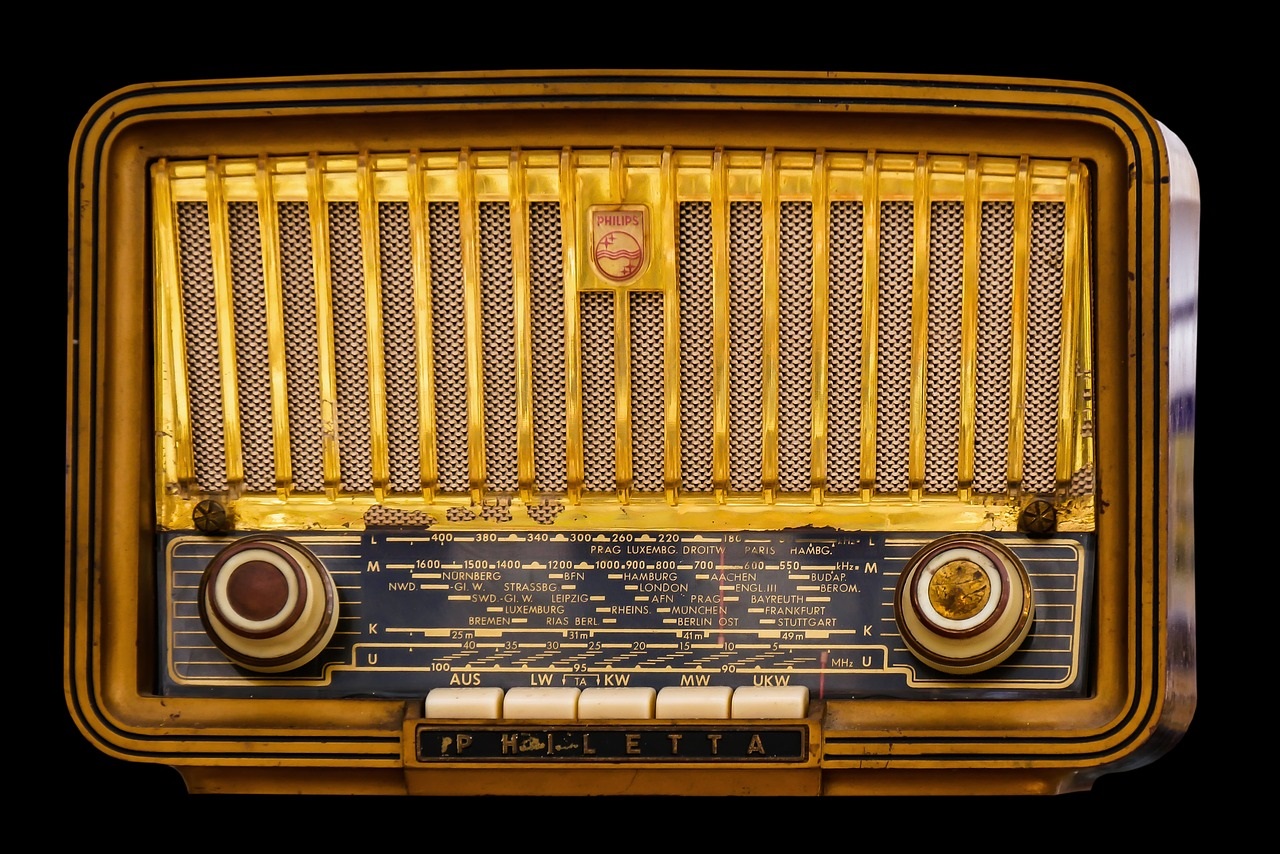
Who among us does not have good-quality technique from the past, which works as well as many popular things from the present did not dream of. Old amps, record players, and radios. Yes, there was a time when they did not know how to make fragile and short-lived in pursuit of cheapness. These things will work for a long time. And the sound of some old amplifier will delight both us and our children.
But what prevents us from using all these technologies in the old technique? And why is it necessary in the old one … Do you have RCA, miniJack 3.5 or S / PDIF connector on your radio tape recorder? Then we go to you and … And we make a multifunctional media server from an old amplifier using a Raspberry Pi. We connect our Raspberry Pi via RCA and update our technology to the “spearhead of technological attack”. It is not necessary to use RCA. Find an analog or digital input on your equipment and choose the right package for your Raspberry Pi.
I will consider the issue from a purely practical point of view. How to get things set up quickly on a Raspberry Pi? After all, there are enough articles by professionals about the peculiarities of a particular technology in order not to dwell on this. I’ll take a Raspberry Pi and a digital audio processing board based on the PCM 5102 A chip as an example.
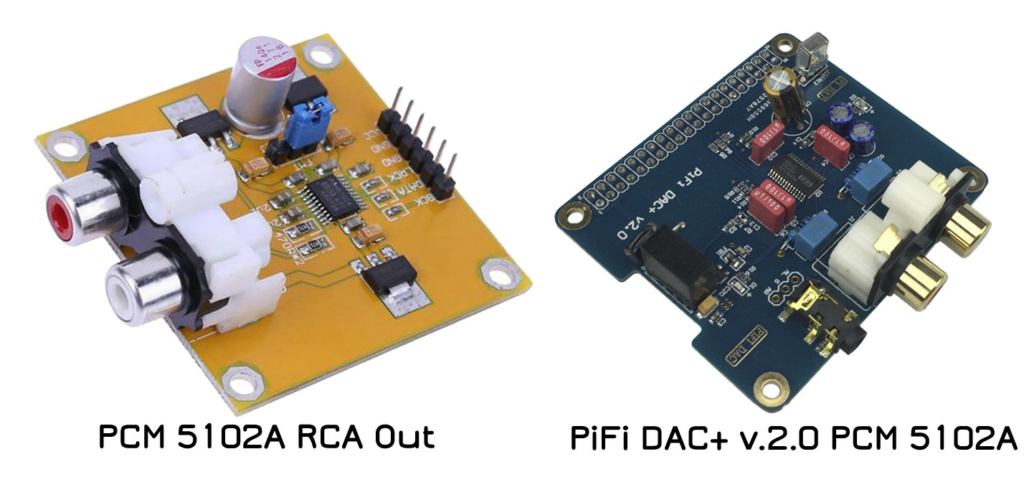
There are many different variants of DAC music systems to suit every taste and color. The choice is only yours. Here are some of them for the Raspberry Pi. DAC is a digital-to-analog converter. I will take one of the cheapest analogs of this device. Judging by various reviews on the web, the well-proven PCM 5102 A. It has 6 pins, and we can easily connect it to our Raspberry Pi via the GPIO connector. Moreover, any series of our Raspberry will do. Indeed, the youngest of them, the Raspberry Pi Zero, is enough for playing music. Although, without the exact input for any given task facing our Raspberry Pi, everything is relative. And such a statement is an estimated opinion of the author. Next, to connect to the GPIO of our board, we use the following scheme:
BCK -> Pin 12 (GPIO18)
DATA(SCLK) -> Pin 40 (GPIO21)
LRCK -> Pin 35 (GPIO19)
GND -> Pin 39 (GND)
GND -> Pin 34 (GND)
VCC -> Pin 2 (5v)
And we need to connect the device driver in config.txt:
sudo nano /boot/config.txt
Change to:
dtoverlay=hifiberry-dac
#dtparam=audio=on
Reboot and make sure that everything is OK in the kernel logs:
dmesg |grep hifi
And let’s see our card through the listing of available alsa devices:
aplay -l
**** List of PLAYBACK Hardware Devices ****
card 0: sndrpihifiberry [snd_rpi_hifiberry_dac], device 0: HifiBerry DAC HiFi pcm5102a-hifi-0 [HifiBerry DAC HiFi pcm5102a-hifi-0]
Subdevices: 1/1
Subdevice #0: subdevice #0
If something went wrong, turn on debug mode:
sudo nano /boot/config.txt
dtdebug=1
And let’s see what happens:
sudo dmesg
sudo vcdbg log msg
And, in theory, by launching a player, say, mplayer with some mp3, you can hear music through a channel on your equipment to which you are connected.
Connecting Bluetooth
Bluetooth technology is not outdated and is actively developing. Bluetooth transmitters are constantly updating the version. You can listen to music through it in Hi-end quality. It was born to use a radio channel with a large load of radio airwaves. This is important when using it in the city for transmitting media content. However, when using the built-in transmitter… on Raspberry not everything is smooth. And interference when listening to music through it can be heard. Alternatively, use an external USB Bluetooth antenna. It will allow to avoid losses, which in general, is a separate topic that requires further study. Nevertheless, it is quite simple and fast to send audio via Bluetooth. For example, from a computer to a Raspberry Pi and then-through the amplifier to the speakers. Or connect to Raspberry from your phone and listen to music. Therefore, we launch Bluetooth on Raspberry. To start, we need three components…
Bluetooth server
Pulse-audio
Bluetooth client
This is not a mandatory set, but as practice has shown, all three components allow you to quickly and transparently run Bluetooth on the Raspberry Pi. As a result, we should get three running services:
bluetooth.service
bt-agent.service
pulseaudio
The first is used as a server part, Bt-agent as a bluetooth client for processing incoming authorization requests. This is convenient for automating connection processes without the hassle of manually connecting to our channel. And pulse audio as a server that processes audio, and as a transparent layer for automatically redirecting it between devices.
Install the required packages:
sudo apt-get install pulseaudio pulseaudio-module-bluetooth bluez-tools
Let’s include the pi user in the pulse-access bluetooth groups
sudo usermod -a -G bluetooth pi
sudo usermod -a -G pulse-access pi
sudo adduser pi pulse-access
Start the pulseaudio audio server at startup:
systemctl – user enable pulseaudio
For our Raspberry to work in bluetooth mode with constant detection and with the receiver’s A2DP profile, we will correct the configuration:
sudo nano /etc/bluetooth/main.conf
and in it:
...
Class = 0x41C
...
DiscoverableTimeout = 0
The A2DP standard allows you to transmit sound with a stereo signal and with certain audio compression codecs and consistent parameters in terms of bit rate and sampling frequency. The device class is clearly described here.
http://domoticx.com/bluetooth-class-of-device-lijst-cod/
And Class = 0x41C according to this resource corresponds to the parameters:
Major Device Class -> Audio/Video
Minor device class -> Portable Audio
The A2DP standard allows you to transmit sound with a stereo signal and with certain audio compression codecs and consistent parameters in terms of bit rate and sampling frequency. The device class is clearly described here.
sudo nano /etc/pulse/daemon.conf
and look at the “basic” settings of the type:
; resample-method = speex-float-1
; default-sample-format = s16le
; default-sample-rate = 44100
; alternate-sample-rate = 48000
As a manual for pulseaudio there is a good resource:
https://wiki.archlinux.org/index.php/PulseAudio
Someone recommends resample-method=ffmpeg or resample-method=speex-float-9, it’s up to you if you hear the difference.
We set the necessary parameters and remove the”; ” to uncomment the line
After the changes, restart pulseaudio:
pulseaudio -k && pulseaudio – start
And don’t forget to see how much CPU time pulseaudio will consume with your HI-FI settings:
htop
By loading the processor of the 3rd Raspberry Pi using the DAC of the audio board based on the PCM5102 chip, the flac 24bit file is read with a load of about :
10-15% для resample-metod=speex-float-1
30% для resample-metod=ffmpeg
60% для resample-metod=speex-float-9
And finally, let’s look now in the direction of audio transmission via WiFi using DLNA technology.
MiniDLNA server
If you have a media server on your Raspberry Pi, then in order for your music collection to be visible on other DLNA devices, you need to install a DLNA server. Everything is simple here:
sudo apt-get install minidlna
In the configuration file, edit the folder with our library:
sudo nano /etc/minidlna.conf
And there we specify the correct folder:
media_dir=/home/pi/Music
The rights to the folder must be as follows:
sudo chmod -R 755 папка
Check with the command:
sudo -u minidlna ls -l папка
Starting the service:
sudo sevice minidlna start
And now in our explorer in the network tab there should be something like:
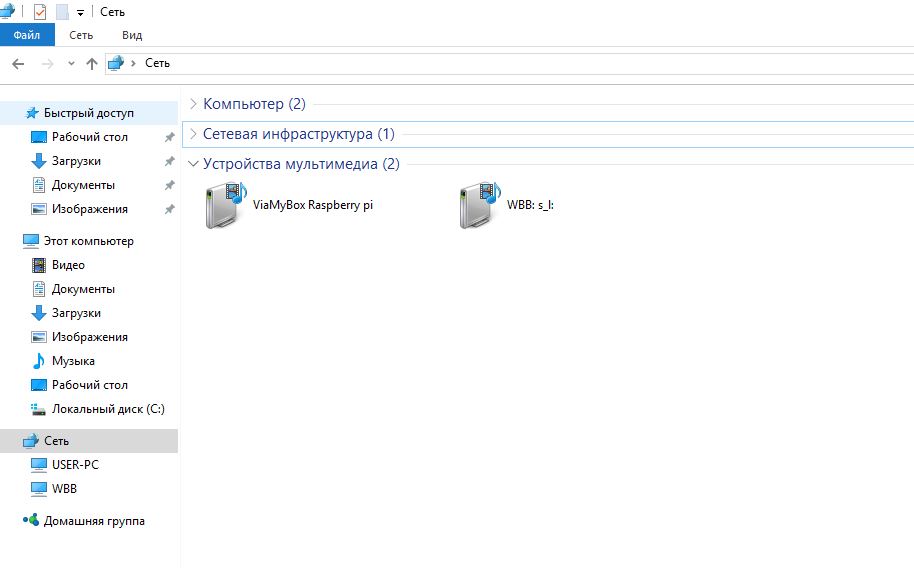
And by clicking on this link, we open the status of our service in the browser:
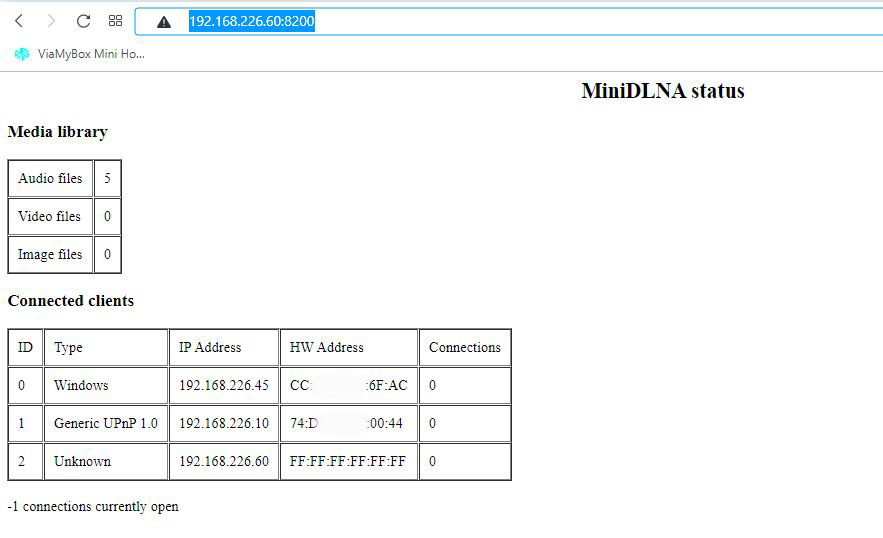
And you can play files through, say, ” windows media player”:

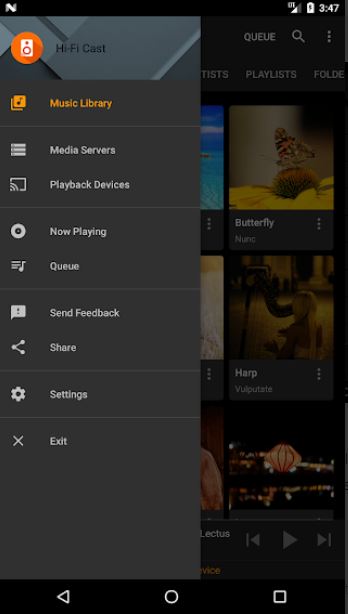
Or run them on android using the “HI-FI Cast” app:
If the task is reversed and we want to play music and movies, view photos that are located somewhere remotely on the server through our Raspberry Pi, then we will need to install dlna render on it. From the device from the application that allows you to find our raspberry mediareader, we will redirect media content to the Raspberry Pi.
I found two renders working perfectly on the Raspberry Pi. Each of them has its advantages.
DLNA Render: Gmediarenderer
The project is developing and full of followers. From the main features, we can say that this render switches output devices, adjusts the volume and has a unique identifier. This will allow you to set up several similar devices on the network. There is a more detailed article about using all the features of DLNA/UPnP as a distributed structure of devices that interact using these protocols and specifically this render. The installation should not cause any difficulties.
Install the necessary packages and gstreamer as the engine for our render:
sudo apt-get install autoconf automake libtool git

sudo apt-get install libupnp-dev libgstreamer1.0-dev \
gstreamer1.0-plugins-base gstreamer1.0-plugins-good \
gstreamer1.0-plugins-bad gstreamer1.0-plugins-ugly \
gstreamer1.0-libav

sudo apt-get install gstreamer1.0-alsa
sudo apt-get install gstreamer1.0-pulseaudio
Let’s take a copy of the project and build it:
git clone https://github.com/hzeller/gmrender-resurrect.git
cd gmrender-resurrect
./autogen.sh
./configure
make
sudo make install
and start it:
gmediarenderer
Find and manage our network player via an Android device remotely will allow a program such as DLNA Controller. Use one of these programs to do this: HiFi Cast, Airpincast, Bubbleupnpcast.
Rygel DLNA render
https://wiki.gnome.org/Projects/Rygel
The project is not only a dlna render. This is a full-fledged media server UpnPMedia Server, which will allow you to share and redirect music videos and photos to any UPnP / DLNA-supported device. Of the stated capabilities, there is on-the-fly conversion of the recording into the format that will be supported by the playback device. Interaction with third-party media players such as Totem, Rhythmbox, VLC. Remote UPnP requests are converted to MPRIS requests and allow interaction with these media players. An example of this interaction between Rygel and VLC is described on David Wiencer’s page:
https://davidwiesner.github.io/posts/using-vlc-as-upnp-renderer-with-rygel/
The bottom line is that we are launching the VLC player. Install support in the mpris configuration file. And when the Rygel app is running, the vlc plays the media content that we send to it via DLNA Rygel.
Install Rygel and VLC:
sudo apt-get install rygel vlc rygel-playbin
If you don’t have gstreamer libraries yet:
sudo apt-get install libupnp-dev libgstreamer1.0-dev \
gstreamer1.0-plugins-base gstreamer1.0-plugins-good \
gstreamer1.0-plugins-bad gstreamer1.0-plugins-ugly \
gstreamer1.0-libav
Make sure that MPRIS support is enabled in the configuration:
nano ~/.config/rygel.conf

[general]
upnp-enabled=true
enable-transcoding=false
[Tracker]
enabled=false
[MediaExport]
enabled=false
[Playbin]
enabled=false
[GstLaunch]
enabled=false
[MPRIS]
enabled=true
[External]
enabled=false
And then, create a script David Wiesner, which runs first VLC then Rygel:
sudo nano rygel-vlc.sh
And in it:
#!/bin/bash
vlcCall="vlc – intf dummy – fullscreen – no-osd"
function cleanup(){
for pid in $(pgrep -f "$vlcCall"); do
kill -9 $pid
done
killall rygel
}
function waitCpuDecrease(){
pid=$1
lastCpu="0.0"
while true; do
cpu=$(ps S -p $pid -o pcpu=)
sleep 0.2
[ $(bc <<< "$cpu < $lastCpu") == 1 ] && break
lastCpu=$cpu
done
}
# killall rygel and vlc
cleanup
# launch vlc in background
$vlcCall &
# wait until vlc has done most stuff
waitCpuDecrease $!
# start rygel
rygel
Let’s run it in the background:
sudo ./rygel-vlc.sh &
And check our DLNA render also via Android using: Hi Fi Cast, Airpincast, Bubbleupnpcast.
I hope over time, we will see and consider new interesting projects for Raspberry Pi on this topic.
And if you are not ready to experiment with Linux, then as assembled, ready-to-work “out of the box” Raspberry Pi with the above functionality, we can offer you kits ViaMyBox “Music fleur”!
You can find the distribution and code here:
Stay with us, your ViaMyBox team!